
This guide goes over how to set up VLANs to logically separate your network using tnsr as a router along with Netgear and Mikrotik switches.
| VLAN | Description | IP (TNSR interface) |
|---|---|---|
| 6 | DMZ | 192.168.10.1/24 |
| 7 | LAN | 192.168.0.1/24 |
| 8 | WORK | 192.168.20.1/24 |
Start by configuring tnsr with new VLAN subinterfaces according to the above table. LAN is the dataplane interface name for your internal LAN interface. Mine is called LAN but yours could be TenGigabitEthernet6/0/0 and the subinterface would be TenGigabitEthernet6/0/0.6 for VLAN 6.
tnsr(config)# interface subif LAN 6
tnsr(config-subif)# dot1q 6
tnsr(config-subif)# exact-match
tnsr(config-subif)# exit

tnsr(config)# interface subif LAN 7
tnsr(config-subif)# dot1q 7
tnsr(config-subif)# exact-match
tnsr(config-subif)# exit

tnsr(config)# interface subif LAN 8
tnsr(config-subif)# dot1q 8
tnsr(config-subif)# exact-match
tnsr(config-subif)# exit

tnsr(config)# interface LAN.6
tnsr(config-interface)# ip address 192.168.10.1/24
tnsr(config-interface)# description DMZ VLAN6
tnsr(config-interface)# ip nat inside
tnsr(config-interface)# enable
tnsr(config-interface)# exit

tnsr(config)# interface LAN.7
tnsr(config-interface)# ip address 192.168.0.1/24
tnsr(config-interface)# description LAN VLAN7
tnsr(config-interface)# ip nat inside
tnsr(config-interface)# enable
tnsr(config-interface)# exit

tnsr(config)# interface LAN.8
tnsr(config-interface)# ip address 192.168.20.1/24
tnsr(config-interface)# description WORK VLAN8
tnsr(config-interface)# enable
tnsr(config-interface)# exit
Next configure DHCP and DNS if needed. I already have DHCP and DNS so on VLAN 7 I won’t configure it but I will enable it for VLAN 6.
DHCP
tnsr(config)# dhcp4 server
tnsr(config-kea-dhcp4)# description DMZ DHCP Server
tnsr(config-kea-dhcp4)# interface listen LAN.6
tnsr(config-kea-dhcp4)# lease lfc-interval 3600
tnsr(config-kea-dhcp4)# option domain-name
tnsr(config-kea-dhcp4-opt)# data dmz.lan
tnsr(config-kea-dhcp4-opt)# exit
tnsr(config-kea-dhcp4)# subnet 192.168.10.0/24
tnsr(config-kea-subnet4)# pool 192.168.10.50-192.168.10.150
tnsr(config-kea-subnet4-pool)# exit
tnsr(config-kea-subnet4)# interface LAN.6
tnsr(config-kea-subnet4)# option domain-name-servers
tnsr(config-kea-subnet4-opt)# data 172.16.10.1
tnsr(config-kea-subnet4-opt)# exit
tnsr(config-kea-subnet4)# option routers
tnsr(config-kea-subnet4-opt)# data 172.16.10.1
tnsr(config-kea-subnet4-opt)# exit
tnsr(config-kea-dhcp4)# exit
DNS
tnsr# configure
tnsr(config)# unbound server
tnsr(config-unbound)# interface 127.0.0.1
tnsr(config-unbound)# interface 192.168.10.1
tnsr(config-unbound)# outgoing-interface WAN
tnsr(config-unbound)# access-control 192.168.10.0/24 allow
tnsr(config-unbound)# exit
tnsr(config)# unbound enable
I have two switches in my environment. One is a Netgear 10g switch which is connected to the LAN port of tnsr on port 09. The other is a Mikrotik 1g switch connected from Netgear port 04 to Mikrotik port 05. Both of these ports will be trunk ports configured to carry all VLAN traffic.
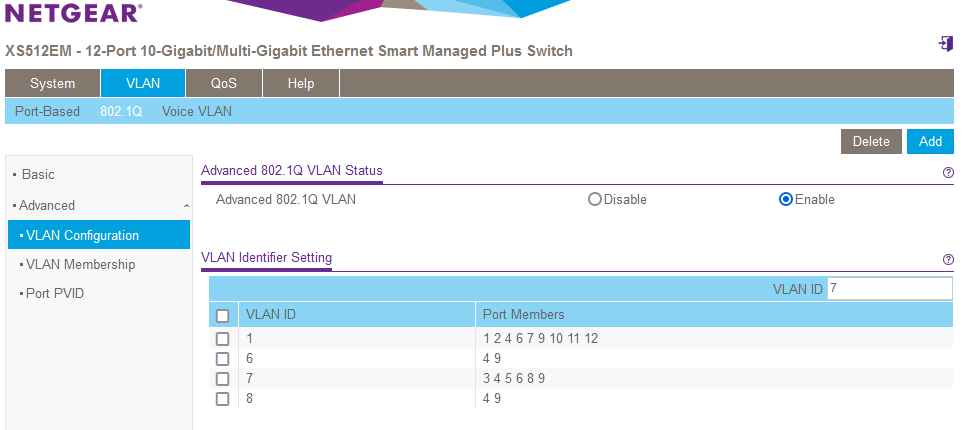
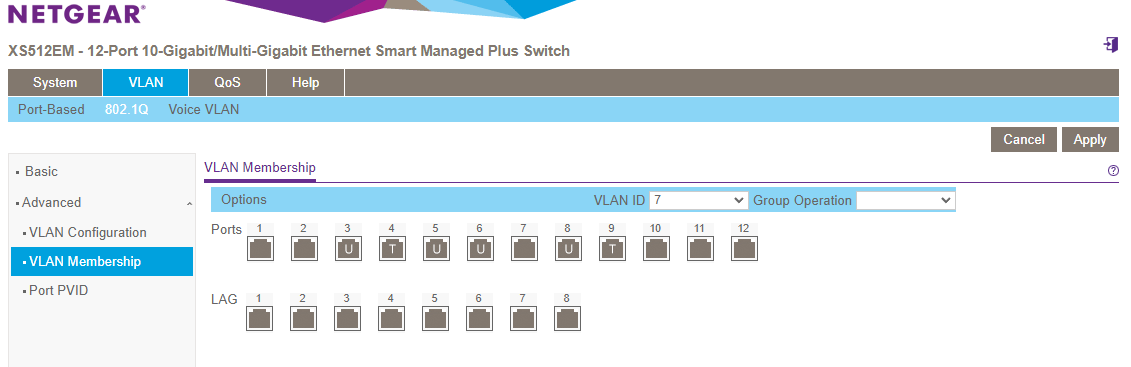
- On the Netgear switch enable Advanced 802.1Q VLAN
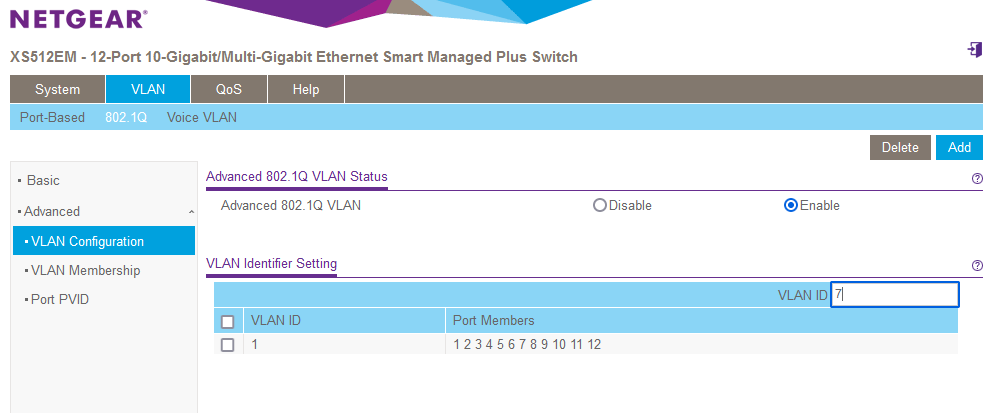
- Add vlans 7
- In VLAN Membership set VLAN 6 7 and 8 to untagged for your two trunk ports (in this case port 4 and 9)
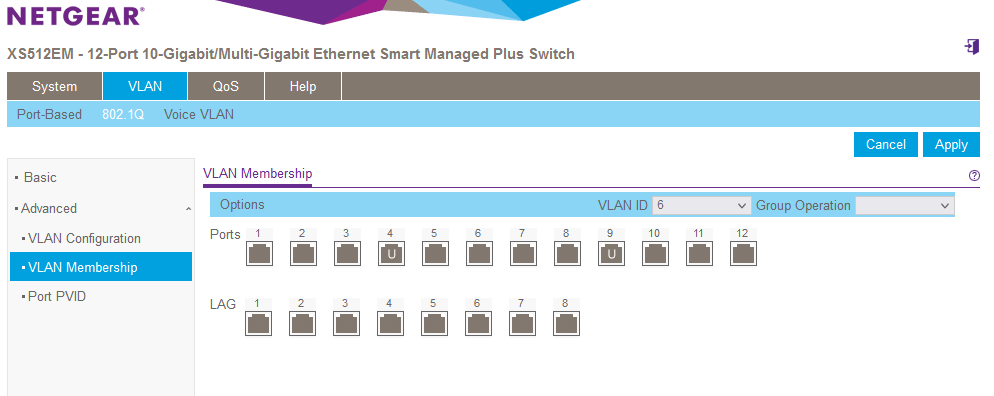
- In VLAN Membership, set all access ports on VLAN 7 to untagged
- Go to Port PVID and set all access ports to VLAN 7 except for the one you are currently connected to the web interface on
- This will temporarily disconnect and move these ports to VLAN 7
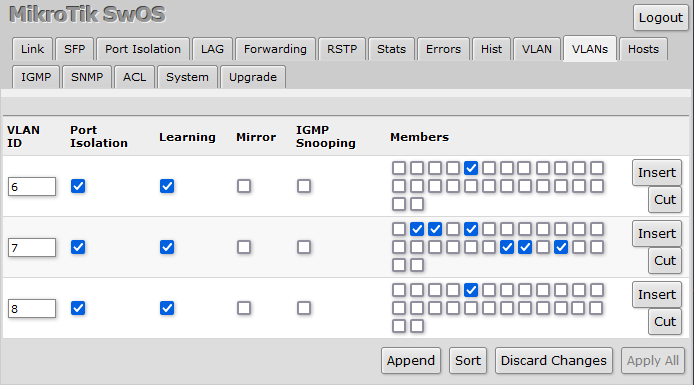
- Now configure the Mikrotik
- Add all three VLANs and configure trunk and access ports as members of the corresponding VLANs
- On the VLAN tab set all access ports to VLAN Mode enabled, VLAN Receive only untagged, Default VLAN ID
- Set the trunk port to VLAN Mode enabled, VLAN Receive only tagged
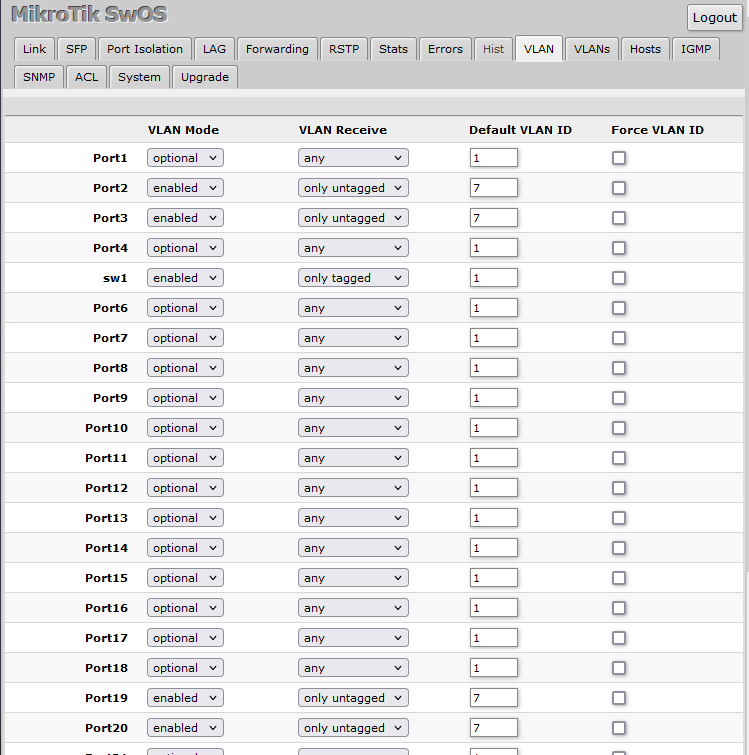
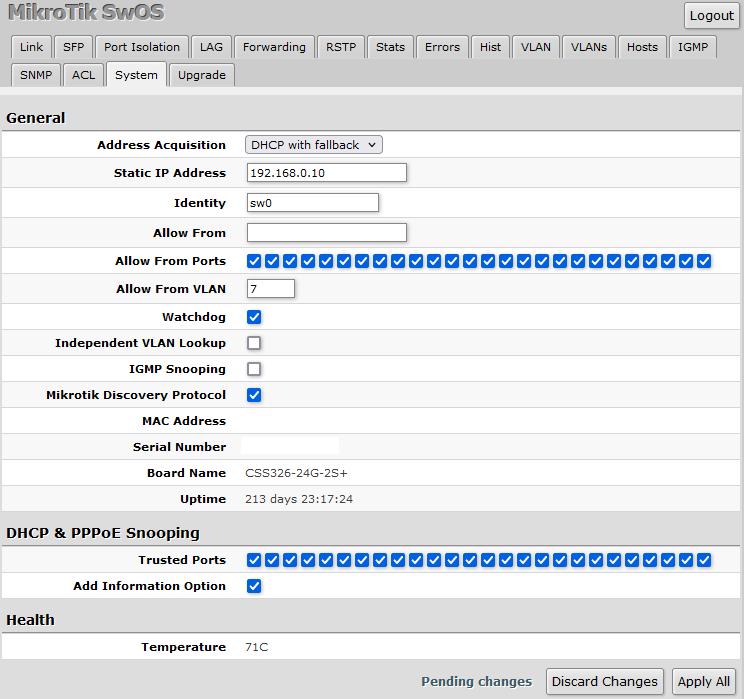
- Set the web interface to allow
- Apply all changes
- This may disconnect you from the Mikrotik web configuration interface
- While your computer is connected to a VLAN 1 untagged port on the Netgate switch, set both trunk ports (Port 09 and 04) to tagged only
- Plug in a laptop to an access port and test to make sure you can get to the internet and other hosts connected to the Mikrotik switch
- Under System - Management - Switch Information, change Management VLAN ID to 7